Classic Apple Pie Recipe: Easy Homemade Pie from Scratch

Introduction
The aroma of apple pie baking in the oven has welcomed family members home for generations. This classic apple pie recipe is as American as… well, apple pie! Making a homemade classic apple pie might seem challenging, but this easy classic apple pie from scratch guide will show you that anyone can do it. This classic apple pie with fresh apples and a classic apple pie with flaky crust has been the star of family gatherings, holidays, and Sunday dinners for over a century.
What Makes Classic Apple Pie Special?
Apple pie represents comfort, tradition, and home. Many grandmothers would save the best apples from fall harvests specifically for their holiday pies. The combination of tender, sweet-tart apples wrapped in a buttery, flaky crust creates pure magic. This isn’t fancy pastry—it’s honest, delicious food that brings people together and creates lasting memories.
Recipe Quick Stats
Classic Apple Pie: At-a-Glance
Ingredients You’ll Need
For the Classic Apple Pie Buttery Crust:
- 2½ cups all-purpose flour
- 1 teaspoon salt
- 1 cup shortening or butter, cold and cubed
- ¼ to ½ cup ice water
For the Traditional Apple Pie Filling:
- 8 cups thinly sliced apples (about 8 medium apples)
- ¾ cup sugar
- 2 tablespoons all-purpose flour
- 1 teaspoon ground cinnamon
- ¼ teaspoon ground nutmeg
- 2 tablespoons butter, cut into small pieces
For Finishing:
- 1 tablespoon milk (for brushing)
- 1 tablespoon sugar (for sprinkling)
How to Make Classic Apple Pie Recipe
Making the Flaky Crust
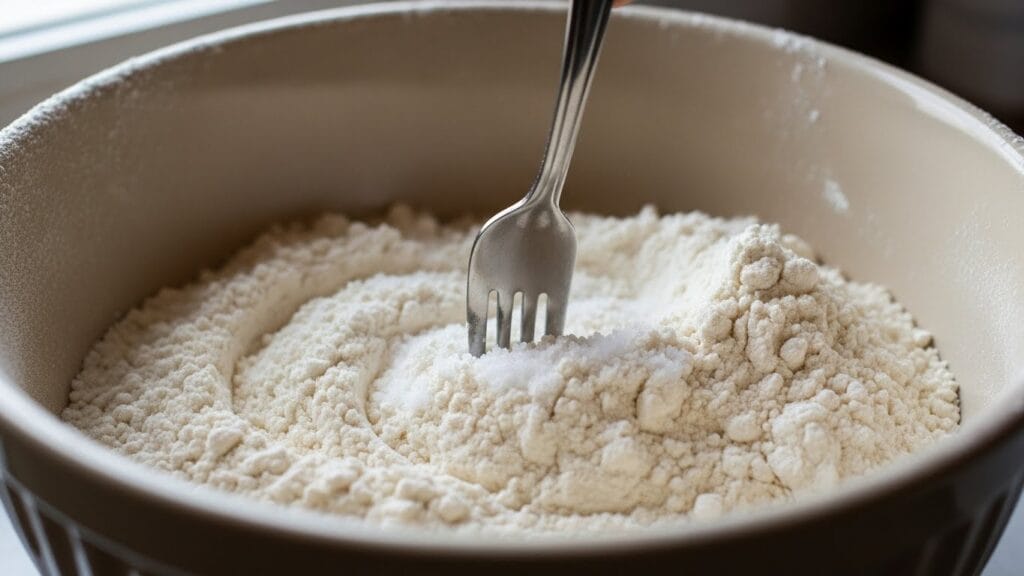
Step 1: Mix the Dry Ingredients In a large bowl, combine the flour and salt. Stir them together with a fork.
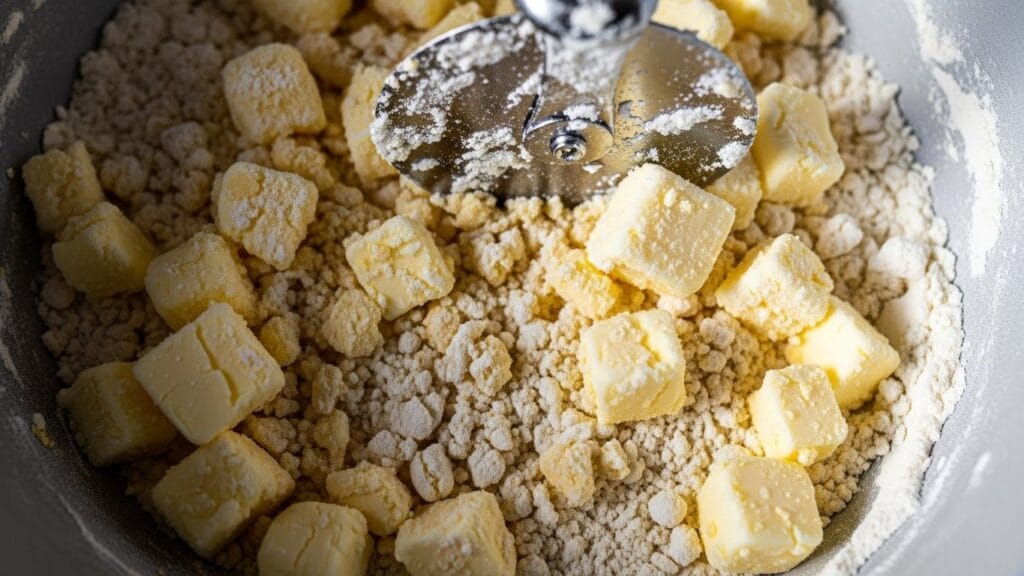
Step 2: Cut in the Fat Add the cold, cubed shortening or butter. Using a pastry cutter, two knives, or your fingers, cut the fat into the flour until the mixture looks like coarse crumbs or small peas. This is what creates the flaky layers!
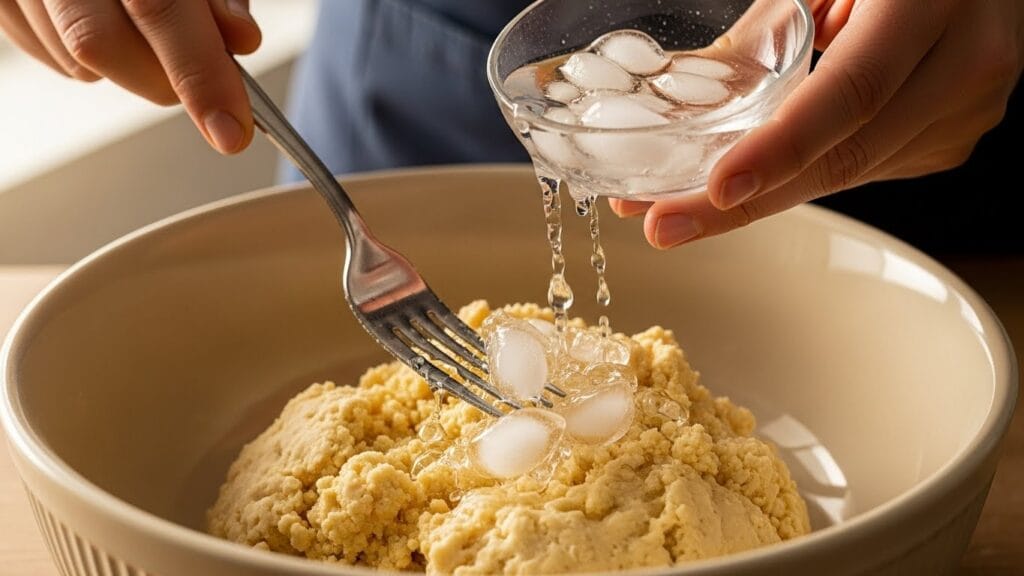
Step 3: Add Ice Water Sprinkle ice water over the mixture, one tablespoon at a time, tossing with a fork after each addition. Add just enough water so the dough comes together when you squeeze it. Don’t add too much water or the crust will be tough.
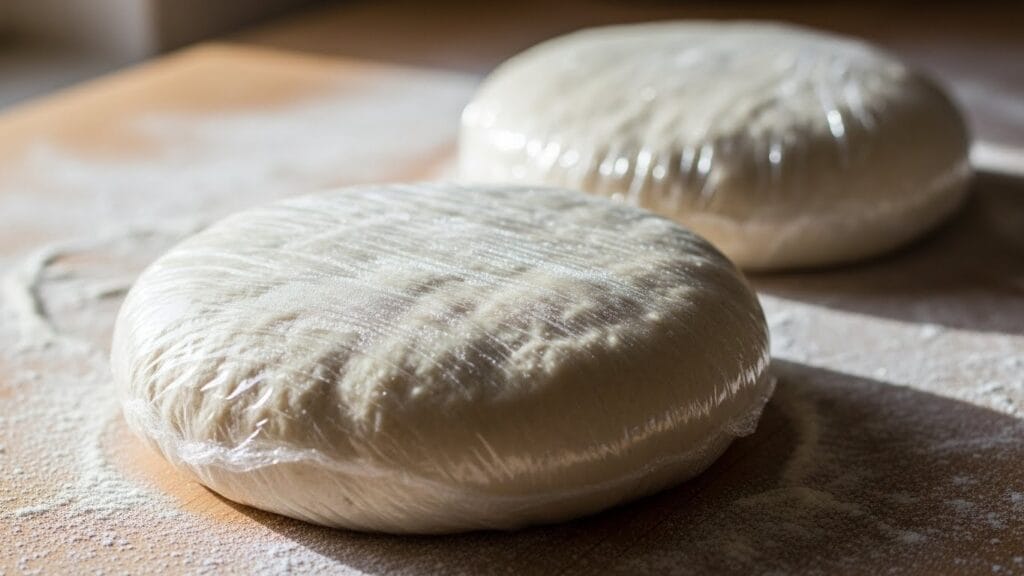
Step 4: Form and Chill Gather the dough into a ball, divide it in half, and flatten each half into a disk. Wrap each disk in plastic wrap and refrigerate for at least 30 minutes. This rest period helps create a tender, flaky crust.
Making the Apple Filling
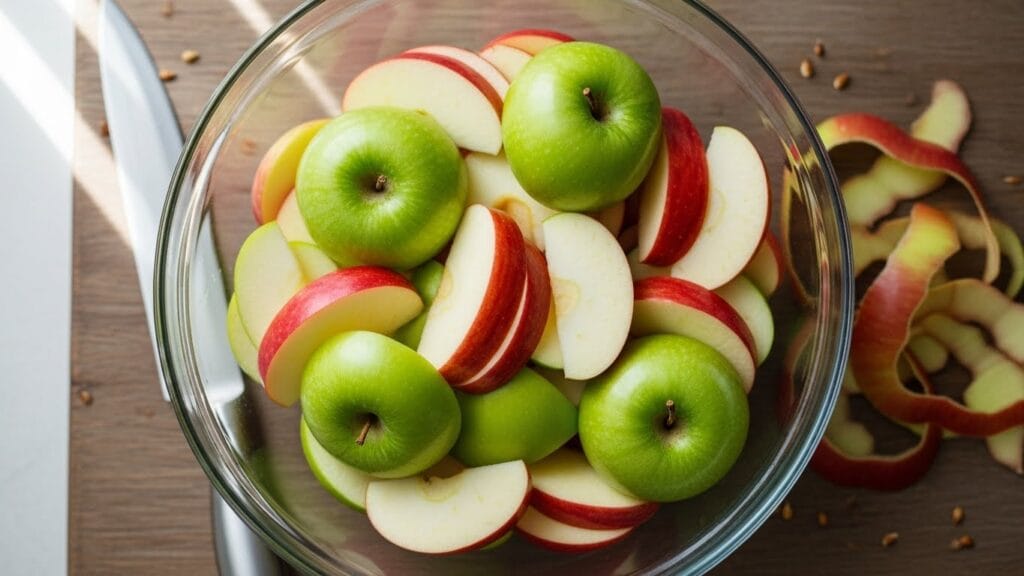
Step 5: Prepare the Apples Peel, core, and thinly slice your apples. Good choices include Granny Smith, Honeycrisp, or a mix of tart and sweet varieties. You’ll need about 8 medium apples.
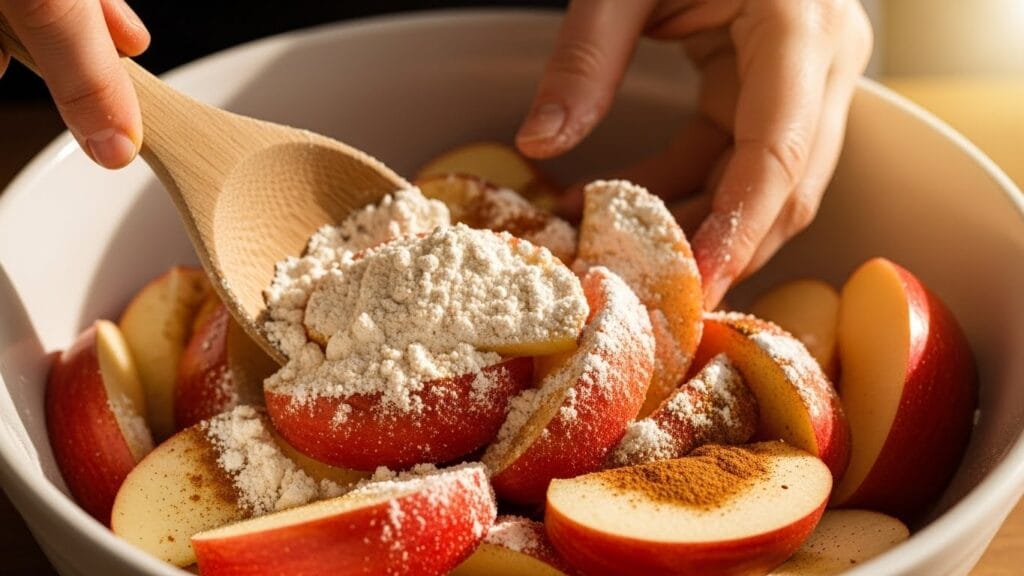
Step 6: Mix the Filling In a large bowl, combine the sliced apples with sugar, flour, cinnamon, and nutmeg. Toss everything together until the apples are evenly coated. The flour helps thicken the juices as the pie bakes.
Assembling and Baking
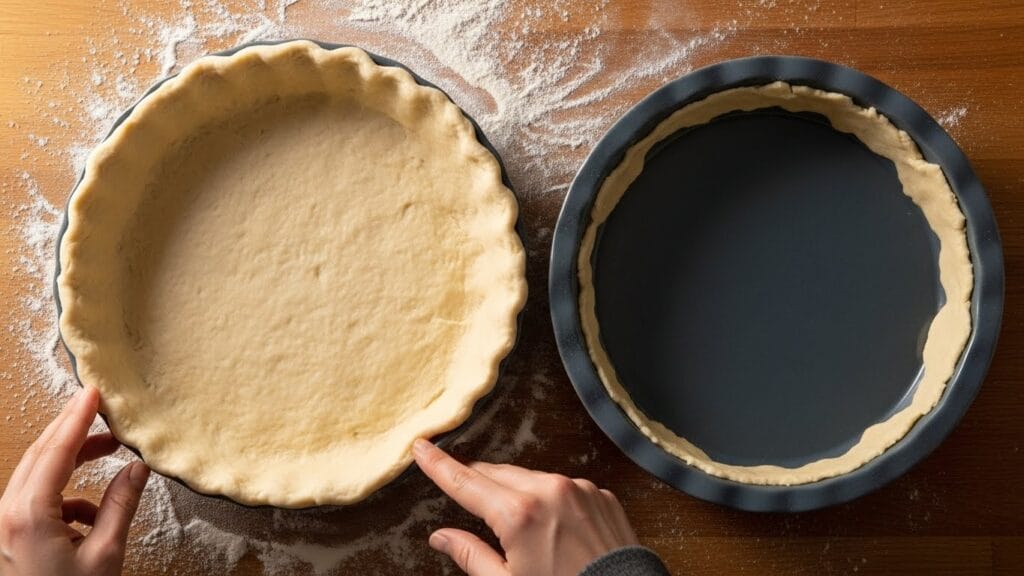
Step 7: Roll Out Bottom Crust Preheat your oven to 375°F. On a lightly floured surface, roll out one disk of dough into a 12-inch circle. Carefully transfer it to a 9-inch pie plate. Gently press it into the bottom and sides. Trim the edges, leaving about ½ inch hanging over.
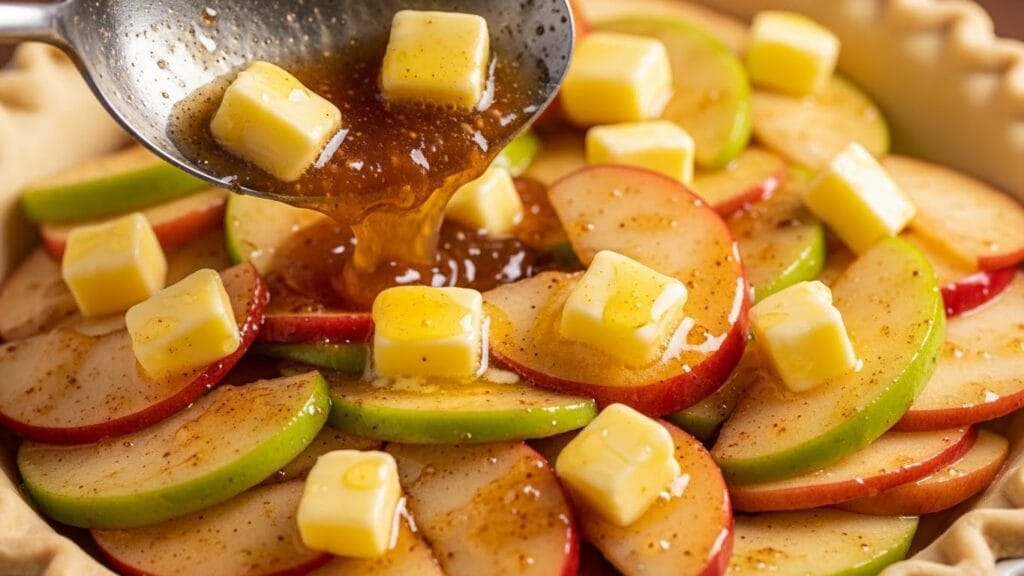
Step 8: Add the Filling Pour the apple mixture into the crust, spreading it evenly. Dot the top with small pieces of butter—this adds richness and helps create a delicious sauce.
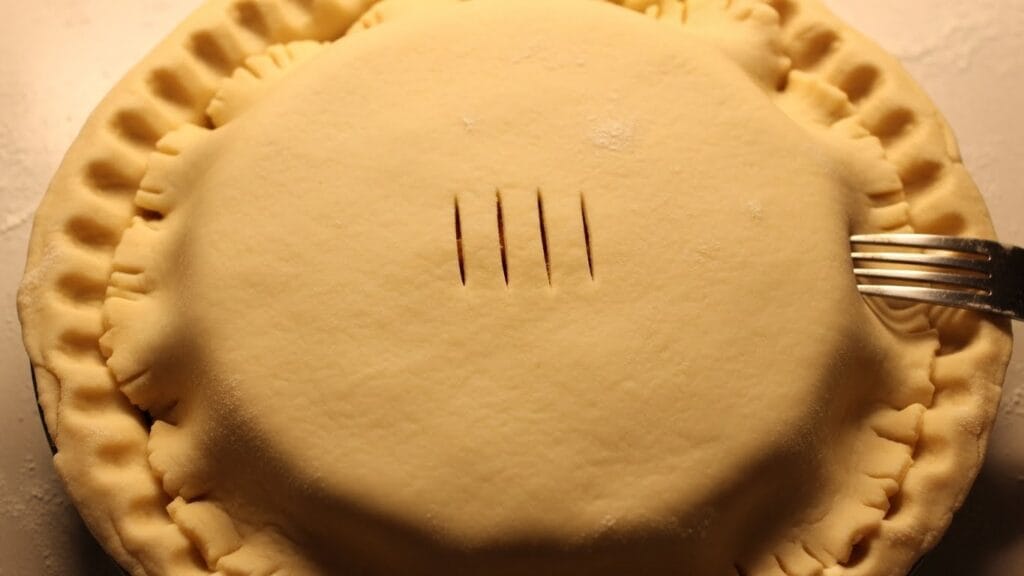
Step 9: Add Top Crust Roll out the second disk of dough into a 12-inch circle. Place it over the filling. Trim the edges, leaving about ½ inch overhang. Fold the top crust edge under the bottom crust edge and crimp with your fingers or a fork to seal. Cut 4-5 small slits in the top to let steam escape.
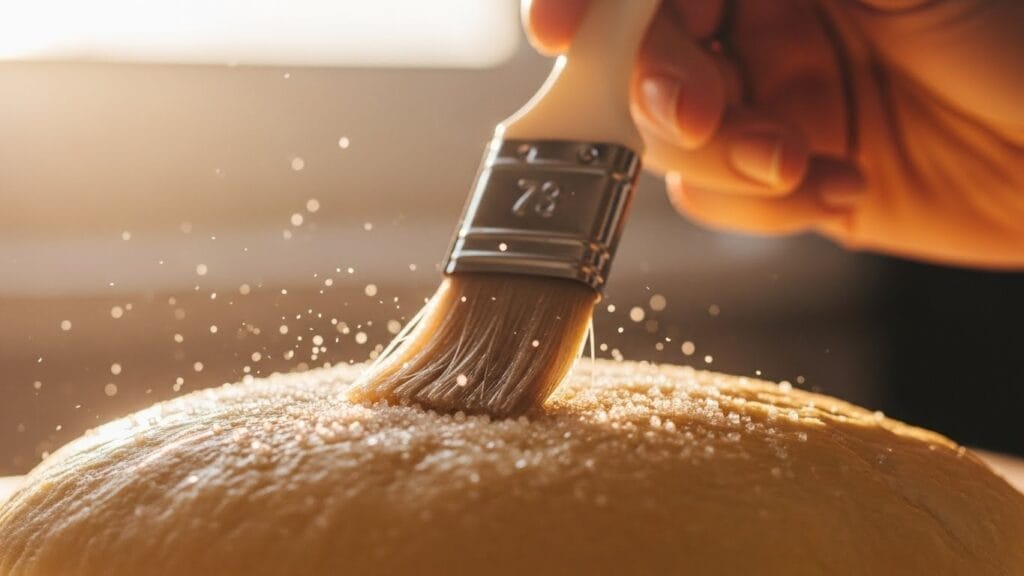
Step 10: Brush and Sprinkle Brush the top crust with milk and sprinkle with sugar. This creates a beautiful golden, slightly sparkly finish.
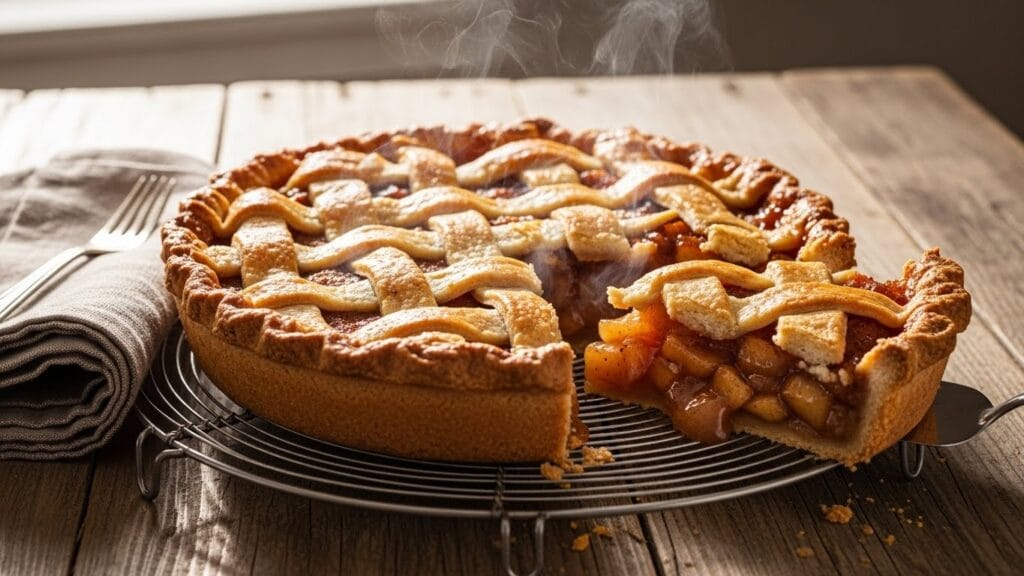
Step 11: Bake Place the pie on a baking sheet (to catch drips) and bake for 50-60 minutes. The crust should be golden brown and you should see the filling bubbling through the slits. If the edges brown too quickly, cover them with strips of aluminum foil during the last 15 minutes.

Step 12: Cool Remove from the oven and cool on a wire rack for at least 1 hour. This allows the filling to set so it won’t be runny when you slice it.
Pro Tips for Perfect Classic Apple Pie
1: For the flakiest crust, make sure all ingredients are cold. Work quickly and don’t overwork the dough. The small bits of cold fat create steam pockets during baking, which make the crust flaky!
2: Use a mix of apple varieties for the best flavor—combine tart apples like Granny Smith with sweeter ones like Honeycrisp or Fuji.
3: Let the pie cool completely before slicing. It’s tempting to cut into it right away, but patience ensures neat slices with thick, delicious filling.
Classic Apple Pie With Fresh Apples
Using classic apple pie with fresh apples makes all the difference in taste and texture. Fresh apples have the perfect balance of sweetness and tartness, and they hold their shape better during baking. Fall is the best time to make this pie when apples are at their peak, but you can make this traditional apple pie filling recipe year-round with fresh apples from your grocery store.
Classic Apple Pie Without Cinnamon
If someone in your family doesn’t like cinnamon, you can make a classic apple pie without cinnamon. Simply leave it out and increase the nutmeg to ½ teaspoon, or add ¼ teaspoon of allspice or cardamom instead. The pie will still be delicious—it will just taste a bit different and more like very old-fashioned recipes from the 1800s when cinnamon was expensive.
Old Fashioned Apple Pie Recipe
This old fashioned apple pie recipe is the real deal—no fancy ingredients or complicated techniques. Just honest, straightforward baking that creates incredible results. Grandmothers made pies like this every week, often using apples they’d stored in their root cellars or picked from their own trees. The recipe hasn’t changed because it doesn’t need to—it’s already perfect.
Classic Apple Pie for Beginners
Don’t be intimidated if you’ve never made pie before! This classic apple pie for beginners guide gives you all the steps you need. The key is taking your time and not worrying about making it perfect. Even a slightly imperfect homemade pie tastes infinitely better than anything from a store. Your first pie might not look magazine-perfect, but it will taste amazing and your family will love it.
Serving Suggestions
Serve your classic apple pie recipeslightly warm or at room temperature. Traditional accompaniments include:
- Vanilla ice cream (the classic “à la mode”)
- Whipped cream
- A slice of sharp cheddar cheese (surprisingly delicious!)
- A drizzle of caramel sauce
Storage and Leftover Advice
Store the pie covered at room temperature for up to 2 days, or refrigerate for up to 5 days. To reheat individual slices, warm them in a 300°F oven for about 10 minutes. This brings back that fresh-baked taste and makes the crust crispy again. You can also freeze unbaked or baked apple pie for up to 3 months.
Frequently Asked Questions (FAQs)
1. What are the best apples for pie?
Granny Smith, Honeycrisp, and Braeburn work great—or mix tart and sweet varieties for complex flavor.
2. Can I use store-bought crust?
Yes, but homemade crust tastes so much better! It’s worth trying at least once to experience the difference.
3. Why is my pie filling runny?
The pie needs to cool completely for the filling to thicken properly—be patient and let it rest!
4. Can I make the crust ahead?
Yes! Wrapped dough disks can be refrigerated for 2 days or frozen for up to 3 months.
5. How do I prevent a soggy bottom crust?
Bake on the lower oven rack and make sure your oven is fully preheated before baking.
A Note from Author
This classic apple pie recipe represents the very essence of American home baking. For generations, the scent of classic apple pie recipe in the oven meant family, celebration, and love. I think about grandmothers carefully peeling apples, their practiced hands working quickly, knowing that this pie would bring smiles to their family’s faces.
Making pie from scratch is an act of care. It takes time and effort, but that’s exactly what makes it special. When you serve a homemade pie, you’re offering more than dessert—you’re sharing a piece of tradition and showing people they’re worth the effort.
At NostalgicEats.com, we believe these traditional recipes and the skills they require deserve to be preserved and celebrated.
Conclusion
This homemade classic apple pie brings generations of baking tradition to your kitchen. This easy classic apple pie from scratch uses classic apple pie with fresh apples to create the perfect traditional apple pie filling recipe. The classic apple pie with flaky crust and classic apple pie buttery crust work together to make an unforgettable dessert. Whether you follow this old fashioned apple pie recipe exactly or make it your own, this classic apple pie for beginners proves that anyone can create something truly special.
Ready to bake a piece of American tradition? Try this classic apple pie recipe today and fill your home with the aroma that has meant “home” for generations! Visit NostalgicEats.com for more timeless recipes!