Dinner Rolls Recipe: Soft, Fluffy Homemade Classic
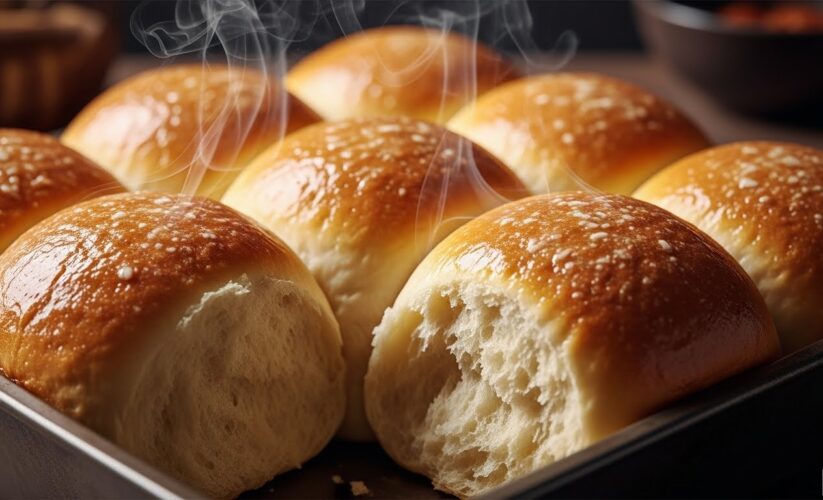
The yeasty aroma filling your kitchen, golden tops glistening with butter, that moment when you pull apart a warm roll to reveal its pillowy center—homemade dinner rolls turn any meal into an occasion. These tender rolls graced American tables at every Sunday dinner and holiday feast, their presence signaling that something special was happening. The secret to their irresistible texture lies in enriched dough with eggs and butter that creates rolls so soft they practically melt on your tongue. One bite with butter spreading into the warm crumb, and you’ll understand why families treasured this recipe.
Recipe Quick Stats
Dinner Rolls: At-a-Glance
Ingredients You’ll Need
Main Ingredients:
- 1 cup warm milk (110°F, lukewarm to the touch)
- ½ cup granulated sugar
- 1 package active dry yeast (2¼ teaspoons)
- 1 teaspoon salt
- 3 large eggs, beaten
- ½ cup butter, softened to room temperature
- 4½ to 5 cups all-purpose flour
- 2-3 tablespoons melted butter for brushing
How to Make Dinner Rolls Recipe
Activating the Yeast
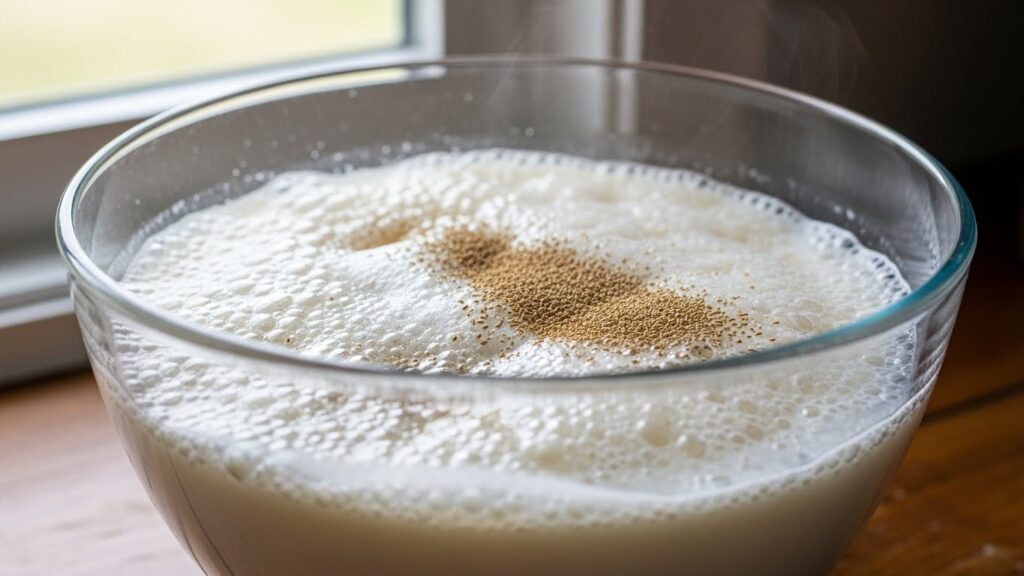
Step 1: In a large mixing bowl, combine warm milk and sugar. Stir until sugar mostly dissolves. The milk should feel comfortably warm against your wrist—too hot kills yeast, too cool prevents activation. Sprinkle yeast over the milk mixture and let stand undisturbed for 5-10 minutes until foamy and bubbly on top. This proves the yeast is alive and ready to work.
Mixing the Dough
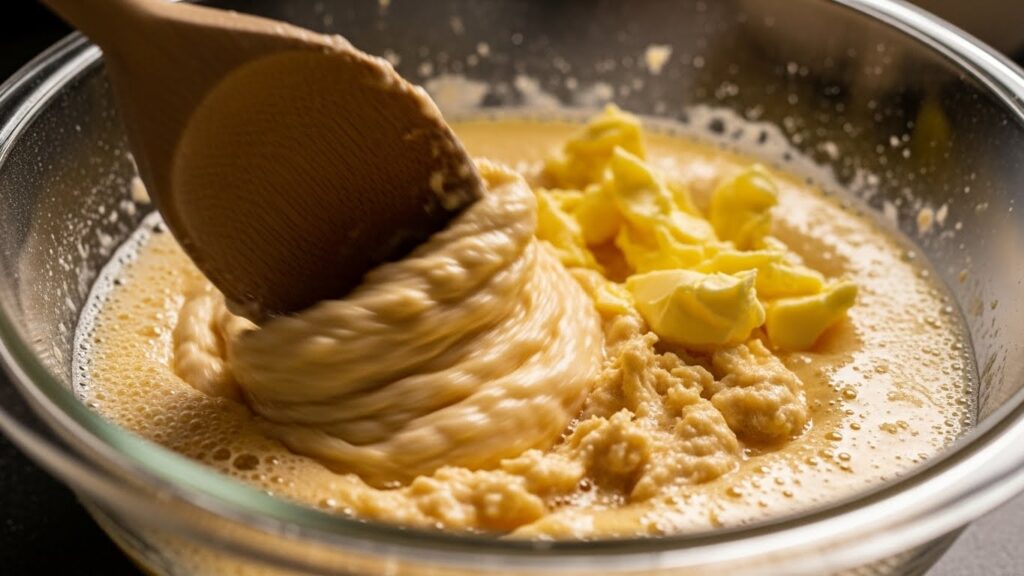
Step 2: Add salt, beaten eggs, and softened butter to the foamy yeast mixture. Stir vigorously until everything is well combined. The mixture will look lumpy and slightly separated—this is normal.
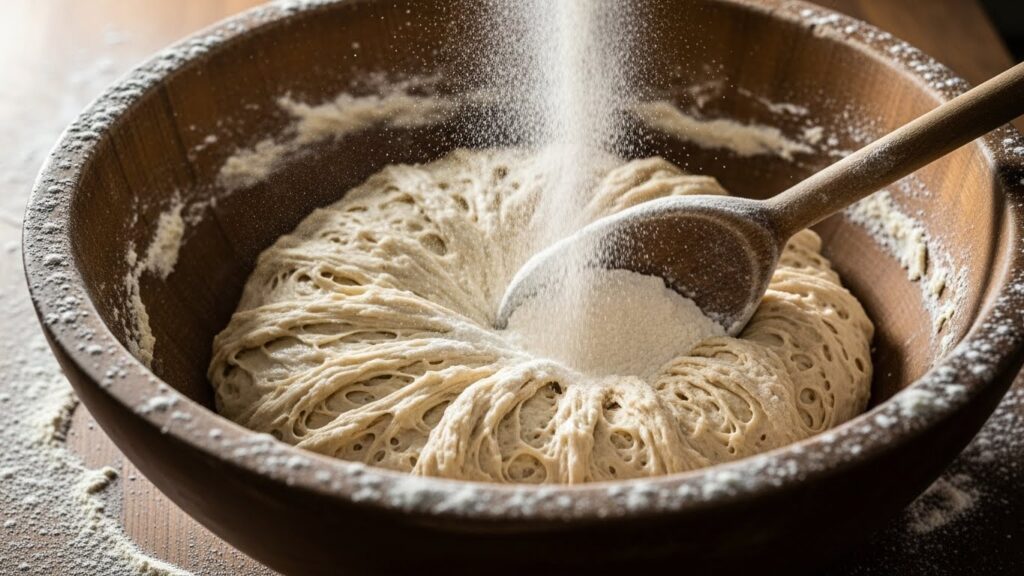
Step 3: Add flour one cup at a time, stirring with a wooden spoon after each addition. After about 4 cups, the dough will become too stiff to stir easily. Add remaining flour gradually until the dough pulls away from the bowl sides and forms a shaggy mass. You may not need all 5 cups—stop when the dough is slightly sticky but manageable.
Kneading and First Rise
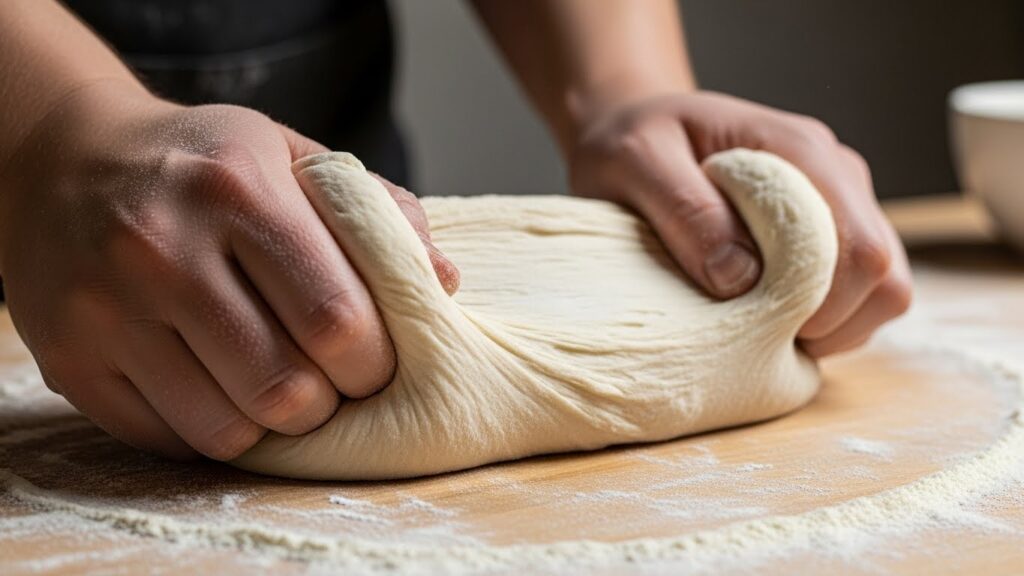
Step 4: Turn dough onto a lightly floured work surface. Knead for 5-8 minutes by pushing the dough away with the heels of your hands, folding it back over, turning it a quarter turn, and repeating. Add small amounts of flour only if the dough sticks excessively—it should remain slightly tacky. The dough is ready when it becomes smooth, elastic, and springs back when poked.
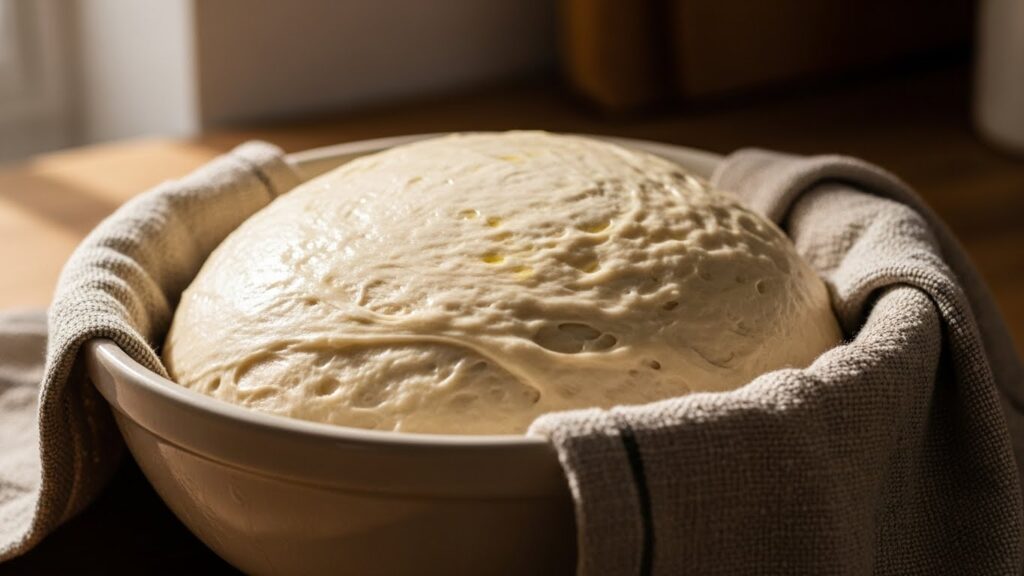
Step 5: Place dough in a greased bowl, turning it once so the top is lightly greased. Cover with a clean kitchen towel or plastic wrap and set in a warm, draft-free place. Let rise until doubled in size, about 1 hour. To test, poke two fingers into the dough—if the indentations remain, it’s ready.
Shaping the Rolls
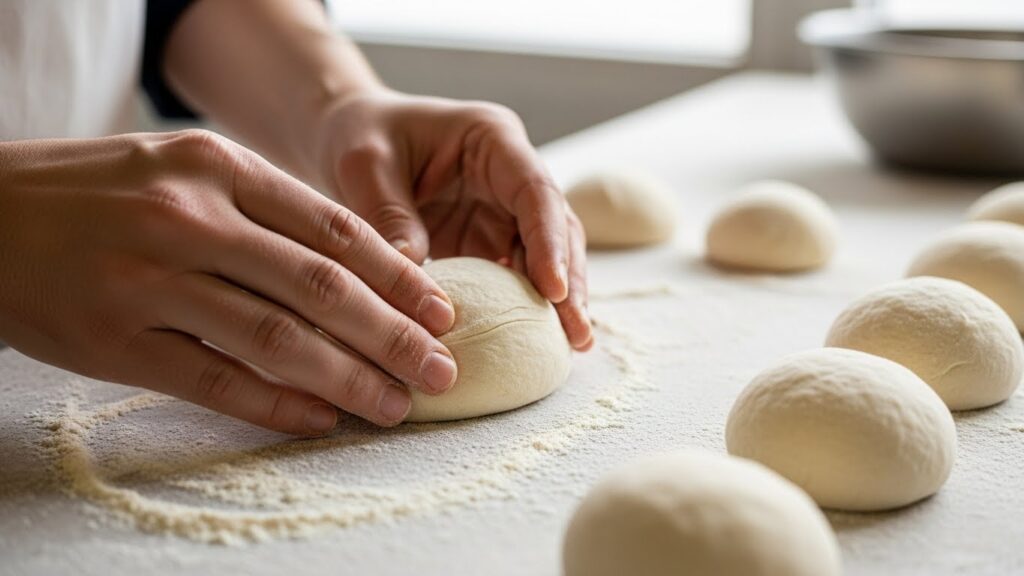
Step 6: Punch down the risen dough with your fist to release air bubbles. Turn it out onto a lightly floured surface. For even-sized rolls, first divide the dough in half, then cut each half into 12 equal pieces (total 24 pieces). A bench scraper or sharp knife works well for this.

Step 7: Shape each piece into a smooth ball by cupping your hand over the dough and rolling it in a circular motion on the work surface. The tension created by your hand shapes it into a neat round with a smooth top. Place shaped rolls in two greased 9×13-inch baking pans, spacing them about 1 inch apart. They’ll rise and touch during baking, creating soft sides.
Second Rise and Baking
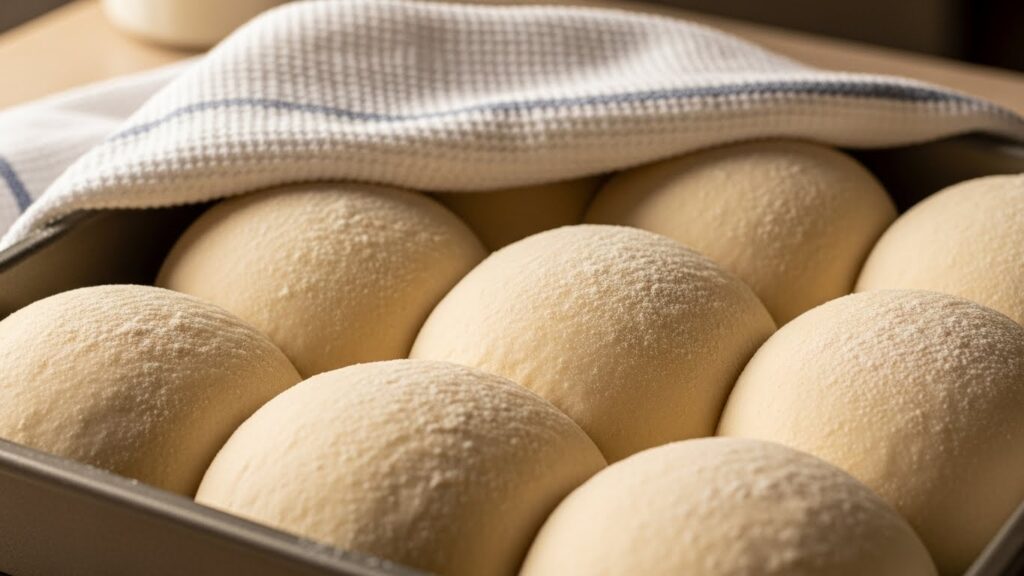
Step 8: Cover the pans with a towel and let rolls rise in a warm place until doubled in size, about 30-45 minutes. The rolls should look puffy and nearly touching each other. This second rise is crucial for light, airy texture.
Step 9: About 15 minutes before the second rise finishes, preheat your oven to 375°F. Position the rack in the center of the oven.
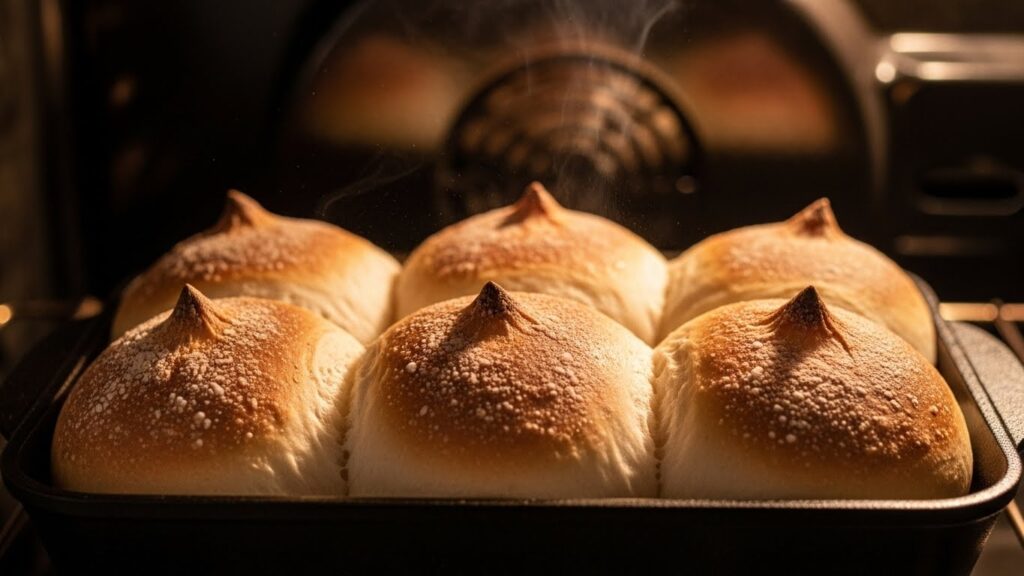
Step 10: Bake rolls for 15-20 minutes until the tops are golden brown. They should sound hollow when tapped. Watch them carefully after 15 minutes—oven temperatures vary and you don’t want them to over-brown.
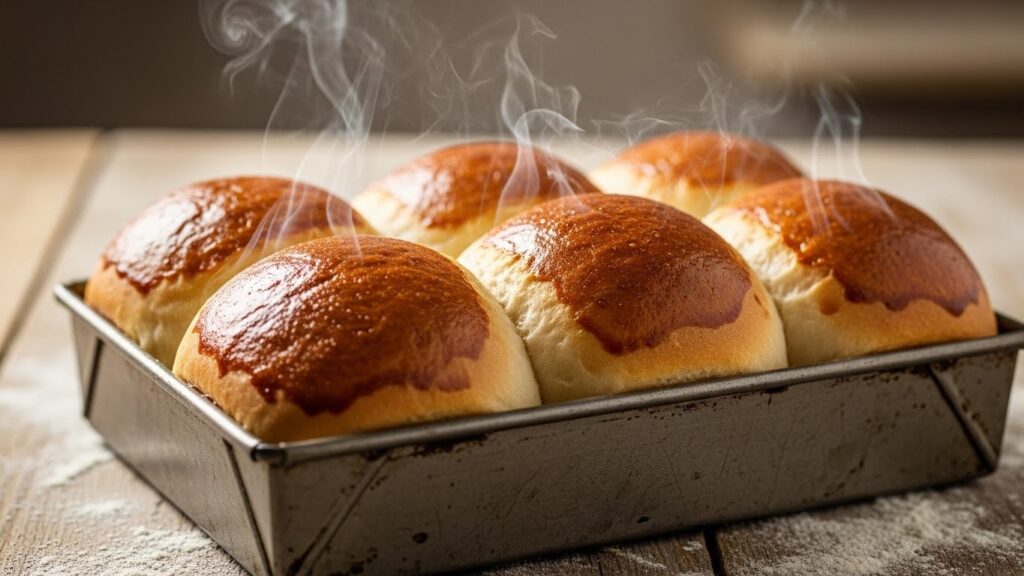
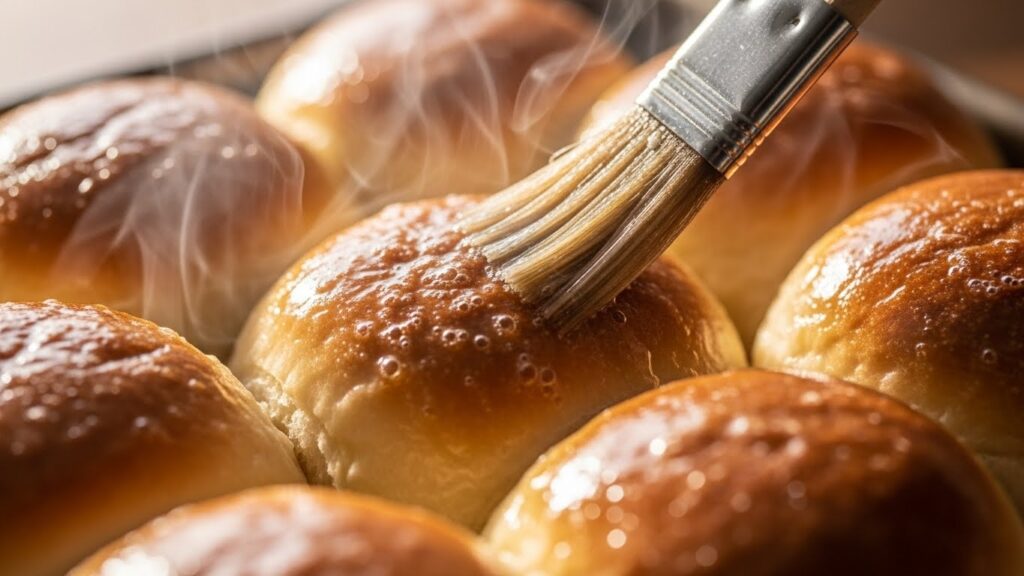
Step 11: Remove from oven and immediately brush the hot rolls generously with melted butter. The butter soaks into the surface, adding flavor and creating a beautiful sheen. Let cool for 5 minutes before serving, or serve immediately if you can’t resist.
Why This Is an Easy Dinner Rolls Recipe
Despite the two-hour timeline, actual hands-on work takes only about 30 minutes. The dough practically makes itself while rising. No complicated techniques or special equipment required—just a bowl, your hands, and two baking pans. The enriched dough is forgiving and handles beautifully, making it ideal for beginners. Even if your shaping isn’t perfect, the rolls still bake up tender and delicious. This recipe uses basic pantry staples and creates consistent results every time.
How to Make Dinner Rolls at Home Successfully
Success starts with proper yeast activation—that foamy proof confirms your yeast works. Keep all ingredients at room temperature for even mixing. Create a warm rising environment by placing the bowl near a warm oven, in an oven with just the light on, or on top of the refrigerator. Knead until the dough passes the windowpane test—stretch a small piece and it should form a thin membrane without tearing. Don’t skip the second rise; it’s essential for light texture. Finally, resist the urge to add too much flour—slightly sticky dough creates softer rolls.
Why Are My Dinner Rolls Not Soft?
Hard or dense rolls usually result from too much flour, insufficient rising time, or over-baking. Add flour gradually and stop when the dough is just manageable—it should remain slightly tacky. Ensure both rises are complete; underproofed dough bakes dense. Check oven temperature with a thermometer; too hot dries out rolls before they finish baking. Old yeast that doesn’t activate properly also creates dense texture. Finally, brush with butter immediately after baking—this keeps the crust soft.
Simple Recipe Tips
1: Warm the milk to the correct temperature. Test it on your wrist—it should feel pleasantly warm but not hot. Too hot kills yeast; too cool slows activation significantly.
2: For perfectly uniform rolls, weigh the dough pieces. Each should be about 2 ounces (55-60 grams). This creates rolls that rise and bake at the same rate.
3: Make the dough the night before. After the first rise, punch down, cover tightly, and refrigerate overnight. Next day, bring to room temperature for 30 minutes, shape, let rise, and bake.
Mistake to Avoid: Don’t place rolls too far apart. They should be about 1 inch apart so they rise together and create soft sides. Rolls spaced too far apart develop hard crusts all around.
How Long Do Dinner Rolls Last?
Store completely cooled rolls in an airtight container or resealable bag at room temperature for 2-3 days. The butter in the dough keeps them soft longer than lean breads. Don’t refrigerate—this accelerates staling and makes rolls dry and crumbly. If you notice them starting to harden after a day or two, warm them in the oven to refresh. For longer storage, freeze them instead of refrigerating.
Can You Freeze Dinner Rolls?
Yes, these rolls freeze beautifully for up to 3 months. Cool completely, place in freezer bags with as much air pressed out as possible, and freeze. To serve, thaw at room temperature for 1-2 hours, then warm in a 300°F oven wrapped in foil for 10 minutes. They’ll taste freshly baked. You can also freeze the shaped, unbaked rolls after the second rise—freeze on a baking sheet until solid, then transfer to freezer bags. Bake directly from frozen, adding 5-10 minutes to the baking time.
How to Reheat Dinner Rolls
The best method is wrapping rolls in aluminum foil and heating in a 300°F oven for 10 minutes. This warms them through without drying out the exterior. For individual rolls, microwave for 10-15 seconds wrapped in a damp paper towel. The moisture keeps them soft. For a slightly crispy exterior, heat unwrapped rolls at 350°F for 5 minutes. Brush with butter after reheating for extra richness.
Soft Fluffy Dinner Rolls for Beginners
This recipe is perfect for first-time bread bakers. The enriched dough is easier to handle than lean doughs, and the method is straightforward with no tricky steps. If you’ve never made yeast bread before, this recipe builds confidence. The visual cues (doubled in size, golden brown) make it clear when each step is complete. Even imperfectly shaped rolls taste delicious. Start with this recipe to learn basic bread-making techniques that apply to countless other recipes.
Classic Dinner Rolls: A Holiday Tradition
These rolls appeared at every American holiday table through the 20th century. Their presence signaled special occasions and family gatherings. Grandmothers made them for Thanksgiving, Christmas, and Easter, the recipe passed down through generations. The aroma of baking rolls told families that dinner was almost ready. Pulling apart warm rolls and spreading them with butter became a cherished ritual. This recipe connects us to those traditions and the cooks who made every meal feel important.
Make Ahead Dinner Rolls
Prepare the dough through the first rise, punch down, and refrigerate for up to 24 hours. The cold dough actually develops better flavor. Next day, bring to room temperature (30 minutes), shape, let rise, and bake. Alternatively, shape the rolls and freeze them unbaked on a baking sheet, then transfer to bags. Bake from frozen when needed. For fully baked make-ahead, bake completely, cool, and freeze. Thaw and reheat before serving. These methods let you enjoy fresh-tasting rolls without day-of stress.
Perfect Pairings
These versatile rolls complement virtually any meal. Serve them with holiday turkey, roast beef, or baked ham where they soak up savory juices. They’re equally perfect with weeknight dinners like our easy fried chicken recipe. The soft texture makes them ideal for sandwiches using leftover meat. Serve alongside our buttermilk biscuits for a bread basket variety. For more homemade breads, explore our breads and biscuits collection.
Serving Suggestions
Serve warm rolls in a napkin-lined basket to keep them soft and warm. Place butter on the table so everyone can add their own. For special meals, brush rolls with melted butter mixed with a pinch of garlic powder and fresh chopped parsley—this creates irresistible garlic butter rolls. The rolls look beautiful when they’re still connected after baking, creating a pull-apart effect at the table. For brunch, serve with jam or honey alongside the butter.
Storage and Leftover Advice
Keep rolls fresh by storing them properly once completely cooled. An airtight container or resealable bag at room temperature maintains softness for 2-3 days. Avoid storing near moisture or in direct sunlight. If rolls start to firm up, wrap them in foil and warm in a low oven—they’ll soften again. Leftover rolls make excellent bread crumbs, croutons, or bread pudding. They’re also perfect for making sliders using leftover ham or turkey.
Frequently Asked Questions
1. Can I use instant yeast instead of active dry?
Yes. Use the same amount and mix it directly with the dry ingredients—no need to proof it first. The rise times will be approximately the same.
2. My dough is too sticky. What should I do?
Add flour 1 tablespoon at a time while kneading until the dough is manageable. However, slightly sticky dough creates softer rolls, so don’t add too much.
3. Can I make these without eggs?
Yes, but the texture will change. Substitute 3 tablespoons milk for the eggs. The rolls will be slightly less rich and tender but still good.
4. Why didn’t my yeast foam?
The milk was too hot (killed the yeast), too cold (prevented activation), or the yeast was expired. Start over with fresh yeast and properly warmed milk.
5. Can I bake these in muffin tins?
Yes. Place one dough ball in each greased muffin cup. They’ll bake into tall, individual rolls in about 12-15 minutes.
6. How do I get really golden tops?
Brush with an egg wash (1 beaten egg with 1 tablespoon water) before baking instead of butter after. This creates a shiny, deep golden color.
7. Can I add herbs or cheese?
Absolutely. Mix in ¼ cup grated Parmesan and 1 tablespoon dried herbs (rosemary, thyme, or Italian seasoning) after adding the eggs in Step 2.
A Note from the Author
Homemade dinner rolls represent the kind of cooking that makes meals memorable. There’s something special about serving bread you made with your own hands, watching family pull apart warm rolls and smile at that first buttery bite. This recipe connects us to generations of home bakers who understood that effort shows love. The time spent mixing, kneading, and waiting for rises transforms simple ingredients into something that brings people together. For more recipes that turn ordinary meals into celebrations, visit NostalgicEats.com and subscribe to our Vintage Life of USA YouTube channel.
Conclusion
These soft, fluffy dinner rolls prove that homemade bread is achievable for any home cook willing to spend a few minutes of active effort. The enriched dough creates rolls with tender crumb and golden tops that rival any bakery. Whether you’re preparing a holiday feast or elevating a simple weeknight dinner, these rolls add that special touch that makes everyone feel cared for. Make a batch this weekend and discover why families treasured this recipe for generations.
Ready to fill your kitchen with the aroma of fresh-baked rolls? These soft, buttery beauties make every meal special. Find more homemade breads and biscuits at NostalgicEats.com!