Grandma’s Homemade Hot Cocoa Recipe from Scratch Easy

Why Grandma’s Hot Cocoa Never Gets Lumpy (And Yours Does)
I watched my grandmother make hot cocoa countless times before I tried making it myself — the kind of old-fashioned kitchen moments that shaped how an entire generation cooked. The first time I stirred cocoa powder directly into hot milk, I ended up with a grainy, lumpy mess — almost as frustrating as the first time I made dark chocolate brownies without blooming the cocoa first. I couldn’t understand why hers was always silky smooth while mine was a disaster.
She laughed and said, “You can’t just dump dry cocoa into liquid. You have to make the paste first.” That single technique changed everything about how I make hot cocoa.
The paste method works because cocoa powder is hydrophobic—it repels water and milk. When you add it directly to liquid, the cocoa particles clump together to avoid getting wet. But when you mix cocoa with sugar first, then add just a tiny bit of liquid to form a paste, the sugar helps the cocoa particles separate and hydrate properly.
This simple trick transforms lumpy, disappointing hot cocoa into the smooth, velvety drink grandma always served. Once you learn this technique, you’ll never go back to packet mixes.
Quick Recipe Reference
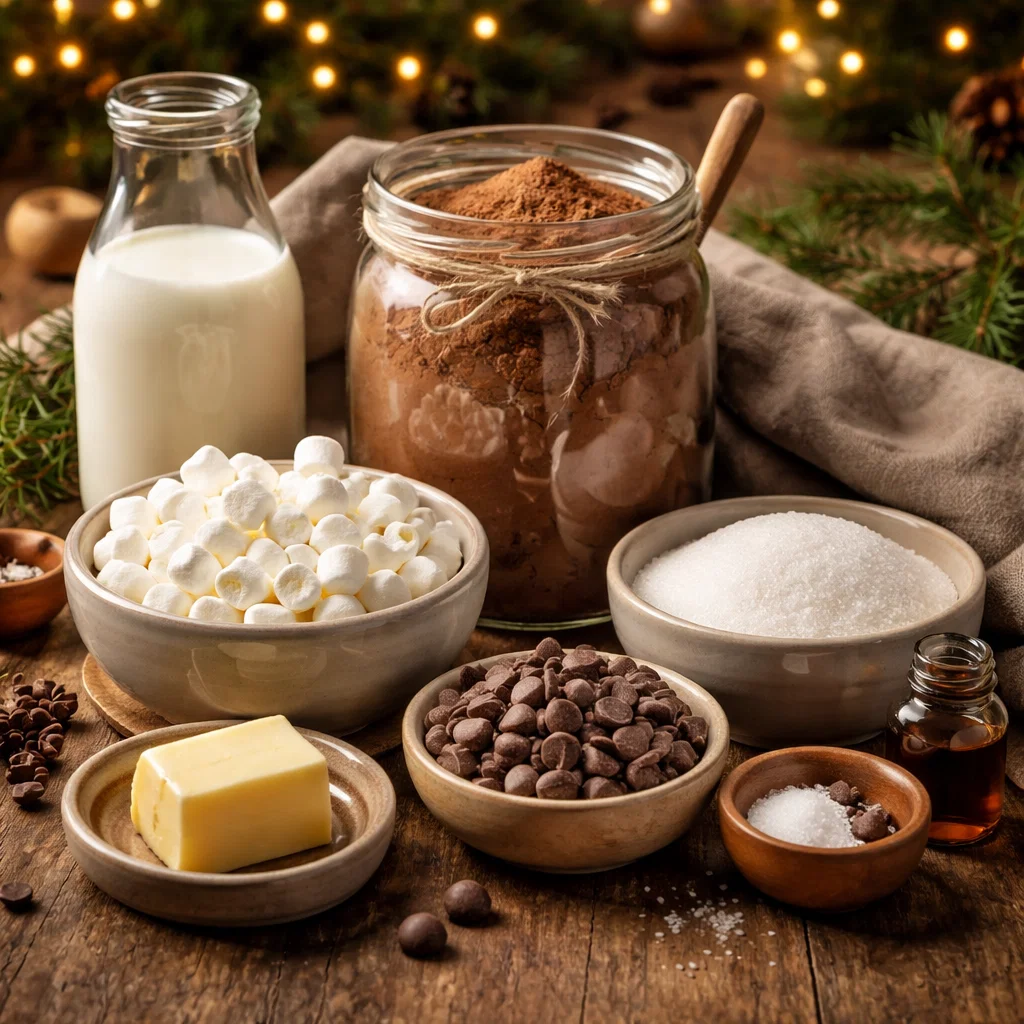
Ingredients You’ll Need
Main Ingredients:
- ⅓ cup unsweetened cocoa powder
- ½ cup granulated sugar
- ⅓ cup hot water (for making paste)
- 4 cups whole milk
- 1 teaspoon vanilla extract
- Pinch of salt
Optional Additions:
- 2 tablespoons heavy cream (extra richness)
- ¼ teaspoon cinnamon
- ⅛ teaspoon espresso powder (deepens chocolate flavor)
- 2 tablespoons chocolate chips (melted in for extra chocolate)
- Whipped cream for topping
- Mini marshmallows
Equipment Needed:
- Medium saucepan
- Whisk
- Measuring cups and spoons
- Ladle or small pitcher
Understanding Hot Cocoa vs Hot Chocolate
Most people use these terms interchangeably, but grandma knew they’re actually different drinks. Hot cocoa is made from cocoa powder—which is chocolate with most of the cocoa butter removed. Hot chocolate is made from actual melted chocolate bars, which contain all that cocoa butter.
Hot cocoa tastes lighter and less rich because it lacks cocoa butter. It’s also easier to make and more forgiving for beginners. The texture is thinner and more drinkable rather than thick and dessert-like.
Hot chocolate tastes intensely chocolatey and rich because you’re melting real chocolate into milk or cream. It has a luxurious, thick texture that almost feels like drinking silk.
Grandma made hot cocoa, not hot chocolate, because cocoa powder was cheaper and easier to store. She could keep a tin of cocoa powder in the pantry for months, while chocolate bars melted in summer or developed white bloom in the cupboard.
Why Cocoa Powder Clumps and How to Prevent It
Cocoa powder is incredibly fine and naturally repels liquid. Each tiny particle has a protective coating that makes it hydrophobic. When you dump cocoa directly into milk, the particles stick to each other to avoid getting wet, creating those stubborn lumps.
Sugar acts as a mediator between cocoa and liquid. When you mix cocoa powder with granulated sugar, the sugar crystals separate the cocoa particles. Then, when you add a small amount of hot water, the sugar begins dissolving and pulls the cocoa particles into solution along with it.
This creates a smooth paste where every cocoa particle is surrounded by dissolved sugar and water. When you then add this paste to hot milk, it disperses evenly without any clumping because the cocoa is already hydrated.
Grandma called this “blooming” the cocoa. Professional bakers use the same technique for brownies and chocolate cakes—mixing cocoa with hot water before adding it to batter prevents chocolate flavor from tasting flat or dusty.
How to Make Grandma’s Hot Cocoa from Scratch
Step 1: Combine Dry Ingredients
In a medium saucepan, whisk together the cocoa powder, sugar, and salt. Whisk thoroughly for about 30 seconds to make sure there are no lumps in the dry mixture. This step prevents clumps later.
The salt enhances chocolate flavor significantly. Don’t skip it—salt makes sweet things taste sweeter and brings out deeper chocolate notes.
Step 2: Make the Cocoa Paste
Add ⅓ cup hot water to the cocoa-sugar mixture. Using a whisk, stir vigorously to form a smooth, thick paste. At first it will look dry and crumbly, but keep stirring. After 15-20 seconds, it will suddenly come together into a shiny, smooth paste.
This paste should be thick like frosting—thick enough that it doesn’t drip off the whisk easily. If it seems too thick, add one more tablespoon of hot water. If too thin, add a teaspoon more cocoa powder.
Step 3: Cook the Paste
Place the saucepan over medium heat. Stir the paste constantly for about 1-2 minutes. You’ll notice it darkens slightly and becomes even smoother. This cooking step removes the raw cocoa powder taste and develops deeper chocolate flavor.
Don’t skip this cooking phase. Raw cocoa powder has a bitter, chalky taste. Cooking it briefly mellows those harsh notes and brings out natural chocolate sweetness.
Step 4: Add Milk Gradually
Remove the pan from heat temporarily. Add about ½ cup of the milk to the hot paste and whisk vigorously. It will bubble and steam—that’s normal. Keep whisking until completely smooth.
Return to medium heat and gradually add the remaining milk while whisking constantly. Adding milk slowly prevents temperature shock that can cause the mixture to seize or separate.
Step 5: Heat Until Steaming
Continue cooking over medium heat, whisking occasionally, until the hot cocoa is steaming and tiny bubbles form around the edges. Don’t let it boil—boiling can make the cocoa taste bitter and creates a skin on top.
The hot cocoa is ready when it’s hot enough that you can’t comfortably hold your finger in it for more than a second. This usually takes 3-4 minutes after adding all the milk.
Step 6: Add Vanilla and Serve
Remove from heat and stir in vanilla extract. Vanilla brightens chocolate flavor and adds warmth. Use real vanilla extract, not imitation—the difference is noticeable.
Ladle into mugs immediately. Top with whipped cream, mini marshmallows, or a sprinkle of cocoa powder if desired — and serve alongside old-fashioned wax bottle candy for a nostalgic treat spread, serve with buttermilk biscuits or graham crackers for dunking.
Pro Tips for Perfect Hot Cocoa
Use Quality Cocoa Powder: Not all cocoa powder tastes the same. Dutch-process cocoa (darker and reddish) tastes smoother and less acidic than natural cocoa. Hershey’s is fine, but Ghirardelli or Droste taste significantly better.
Whole Milk Makes a Difference: Low-fat or skim milk creates thin, watery hot cocoa. Whole milk provides richness and body. For ultra-rich cocoa, use half milk and half cream.
Don’t Let It Boil: Boiling makes cocoa taste bitter and creates a skin on top that’s unpleasant. Keep it just below boiling—steaming hot with small bubbles at the edges.
Whisk, Don’t Stir: A whisk incorporates air and prevents settling better than a spoon. The constant whisking motion keeps cocoa particles suspended evenly.
Add Espresso Powder for Depth: Just ⅛ teaspoon of instant espresso powder intensifies chocolate flavor without making it taste like coffee — the same trick works beautifully in these supreme chocolate chunk brownies. This is a professional pastry chef trick.
Make It Ahead: The cocoa paste (step 2) can be made ahead and stored in the refrigerator for up to a week. When ready to serve, just add milk and heat.
Adjust Sweetness to Taste: Grandma liked hers fairly sweet. For less sweet cocoa, reduce sugar to ⅓ cup. For more adult taste, use only ¼ cup sugar and add a splash of bourbon.
Easy Variations to Try
Mexican Hot Chocolate: Add ½ teaspoon cinnamon and ⅛ teaspoon cayenne pepper to the cocoa-sugar mixture for spicy warmth.
Peppermint Hot Cocoa: Replace vanilla extract with ½ teaspoon peppermint extract. Top with crushed candy canes for Christmas.
Salted Caramel Cocoa: Drizzle 2 tablespoons caramel sauce into each mug before adding cocoa. Top with whipped cream and flaky sea salt.
Mocha Hot Cocoa: Add 2 tablespoons instant coffee granules to the cocoa paste for coffee-chocolate flavor.
Orange Chocolate: Add ½ teaspoon orange extract and a strip of orange zest while heating the milk. Remove zest before serving.
Adult Hot Cocoa: Add 2 tablespoons dark rum, bourbon, or peppermint schnapps to each mug after pouring the hot cocoa.
Why Grandma’s Recipe Uses Cocoa Powder Not Chocolate
Cocoa powder was economical and practical for Depression-era grandmothers, who also relied on resourceful bakes like this tomato soup cake to feed their families. One tin of cocoa powder cost less than chocolate bars and lasted for months of daily hot cocoa.
Storage was easier too. Cocoa powder didn’t melt in summer heat or attract pantry moths like chocolate bars sometimes did. It stayed shelf-stable for a year or more without any special storage.
Cocoa powder also meant consistent results. Chocolate bars vary in sweetness and cocoa content, making it hard to get the same flavor twice. Cocoa powder plus measured sugar gave predictable results every time.
For grandma’s generation, this recipe represented comfort during hard times — much like these Depression-era brownie recipes that stretched ingredients as far as possible. The ingredients were affordable enough for regular enjoyment, yet the result tasted special enough to feel like a treat rather than just sustenance.
Storing and Reheating Hot Cocoa
Leftover hot cocoa can be stored in the refrigerator for up to 3 days in a covered container. The cocoa will settle to the bottom, so you’ll need to whisk or shake vigorously before reheating.
To reheat, pour into a saucepan over medium-low heat and whisk constantly until steaming. Microwave reheating works but tends to create hot spots—stop every 30 seconds to stir thoroughly.
Some people find reheated hot cocoa tastes slightly different than fresh. If you notice this, add a splash of vanilla extract and an extra tablespoon of milk when reheating to refresh the flavor.
For parties, you can keep hot cocoa warm in a slow cooker set on low. Whisk it every 20 minutes to prevent settling and skin formation. It stays good for up to 2 hours this way.
Frequently Asked Questions
Why does my hot cocoa get lumpy even when I whisk it?
You’re adding cocoa powder directly to liquid instead of making a paste first. Cocoa powder repels liquid and clumps. Always mix cocoa with sugar and a small amount of hot water to form a paste before adding milk.
Can I use water instead of milk for hot cocoa?
Yes, but it won’t taste as rich or creamy. Water-based hot cocoa tastes thinner and less satisfying. If avoiding dairy, use oat milk, almond milk, or coconut milk for better texture and flavor.
What’s the difference between hot cocoa and hot chocolate?
Hot cocoa is made from cocoa powder (chocolate with cocoa butter removed), making it lighter and less rich. Hot chocolate is made from melted chocolate bars, making it thicker, richer, and more intensely chocolatey.
Why does my hot chocolate taste bitter?
You either used too much cocoa powder, not enough sugar, or let it boil. Boiling intensifies bitter compounds. Also, natural cocoa powder tastes more acidic than Dutch-process cocoa.
Can I make hot cocoa without sugar?
Yes, but it will taste very bitter. Try using honey, maple syrup, or stevia instead. Start with about 2-3 tablespoons of honey or maple syrup — the same natural sweeteners that make this honey cake so special.
How do you make hot cocoa creamy without cream?
Use whole milk instead of low-fat milk. The fat content creates natural creaminess. Also, whisking vigorously incorporates air that makes cocoa feel lighter and fluffier on your tongue.
Conclusion
Grandma’s homemade hot cocoa recipe from scratch proves that simple techniques create superior results compared to instant mixes — the same vintage kitchen wisdom that has been passed down through generations of American home cooks. The secret to silky smooth cocoa without lumps lies in making that cocoa-sugar paste before adding milk—a method grandmothers perfected through decades of making comforting drinks for cold children and grandchildren.
This technique transforms hydrophobic cocoa powder into perfectly dispersed chocolate flavor that stays smooth from first sip to last. Whether you’re seeking nostalgic comfort, avoiding artificial ingredients in packet mixes, or simply wanting the best-tasting hot cocoa possible, this classic scratch recipe delivers consistent excellence.
The whole process takes just ten minutes and uses ingredients already in your pantry, making it as practical today as it was in grandma’s kitchen seventy years ago — just like this classic cream of wheat with brown sugar and cinnamon that never goes out of style. Ready to make hot cocoa that never gets lumpy? Grab your cocoa powder, make that magic paste, and discover why grandma’s method has survived every modern convenience product that’s tried to replace it. In one sip, you’ll understand why some cooking wisdom never becomes outdated.