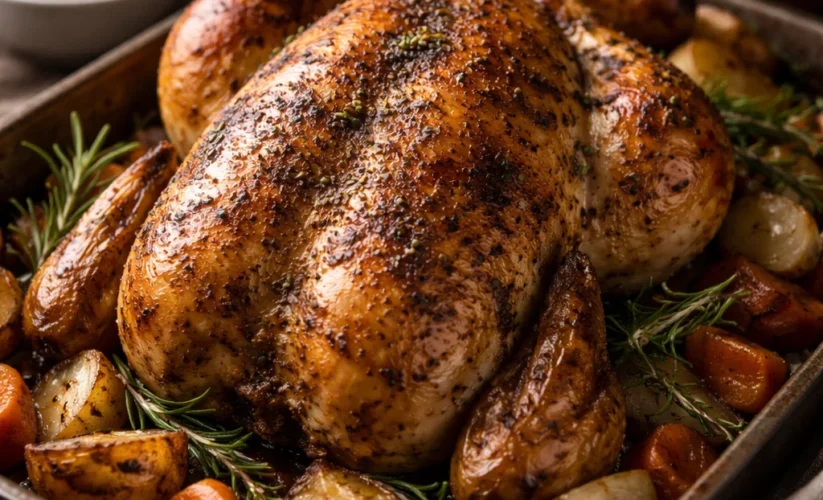
Classic Slow Roasted Whole Chicken Old-Fashioned Recipe
Why Your Roast Chicken Always Comes Out Dry (Temperature Lie)
I roasted chicken the “correct” way for years—cooking until the breast reached 165°F like every food safety chart says. Every single time, the breast meat was dry and stringy while the dark meat was perfectly juicy. I assumed that’s just how chicken was.
Then a chef friend watched me cook and stopped me from pulling the chicken out of the oven — the kind of technique correction you’d only get from watching vintage American home cooks who learned through decades of repetition. “You’re overcooking it,” he said. “White meat is done at 150°F, not 165°F. By the time your breast hits 165°F, it’s been overcooked for fifteen minutes.”
This shocked me. Wasn’t 165°F the magic number for chicken safety? He explained that 165°F kills bacteria instantly, but lower temperatures kill the same bacteria if held there longer. White meat cooked to 150°F and rested for 3 minutes is perfectly safe and dramatically juicier than meat cooked to 165°F.
The challenge with whole chickens is that dark meat needs higher temperature than white meat. Thighs taste best at 175°F when the collagen breaks down completely, while breast is perfect at 150-155°F. Grandma solved this with slow roasting at lower temperature — the same patient approach behind this perfectly tender roast chicken with herb stuffing that never disappoints.
This old-fashioned technique produces the juiciest chicken you’ve ever eaten—breast meat so tender it almost falls apart, and dark meat that slides off the bone. Once you understand the temperature science, you’ll never roast chicken the old way again.
Quick Recipe Reference
Ingredients You’ll Need
Main Ingredients:
- 1 whole chicken (4-5 pounds)
- 3 tablespoons butter, softened
- 2 tablespoons olive oil
- 1 tablespoon kosher salt
- 1 teaspoon black pepper
- 1 teaspoon garlic powder
- 1 teaspoon paprika
- 1 teaspoon dried thyme
Aromatics for Cavity:
- 1 lemon, halved
- 1 whole head garlic, halved crosswise
- 4-5 fresh thyme sprigs
- 1 small onion, quartered
For the Pan:
- 2 cups chopped vegetables (carrots, celery, onions)
- 1 cup chicken broth or water
Optional Additions:
- 1 teaspoon dried rosemary
- ½ teaspoon smoked paprika
- 2 tablespoons fresh herbs (rosemary, sage, thyme)
- 1 tablespoon honey (for golden color)
Understanding Why Chicken Dries Out
Chicken breast contains very little fat and connective tissue. It’s almost pure muscle protein, which means it dries out quickly when overcooked. At 165°F, the proteins have contracted so tightly they’ve squeezed out nearly all their moisture, creating that dry, stringy texture everyone complains about.
Dark meat (thighs and drumsticks) contains more fat and lots of connective tissue (collagen). This collagen needs temperatures above 170°F to break down into gelatin, which creates that fall-off-the-bone tenderness. Dark meat can handle higher temperatures without drying out because the melted collagen and fat keep everything moist.
The 165°F recommendation exists because it kills salmonella instantly. But bacteria die at lower temperatures too—they just need more time. Chicken held at 150°F for 3 minutes is as safe as chicken cooked to 165°F instantly. This is called pasteurization through time-and-temperature.
Slow roasting at lower temperature (around 300-325°F instead of 400-450°F) allows the heat to penetrate evenly. The outside doesn’t overcook while waiting for the inside to reach temperature. The chicken cooks gently and uniformly, producing moist meat throughout.
Resting after cooking is equally crucial. When you pull chicken from the oven, the outer portions are hotter than the center. During the 15-minute rest, temperatures equalize as heat migrates inward. The breast temperature rises 5-10 degrees during rest, completing the cooking without additional heat exposure.
The Secret to Crispy Chicken Skin
Crispy skin while keeping meat juicy seems impossible, but it’s actually simple once you understand the science. Skin crisps when moisture evaporates and fat renders out. Wet skin never crisps—it just steams and stays rubbery.
The first secret is drying the skin thoroughly before cooking. Pat the entire chicken completely dry with paper towels, inside and out. Leave it uncovered in the refrigerator overnight if possible—this air-drying creates the driest skin that crisps beautifully.
The second secret is fat. Butter and oil rubbed under and over the skin conduct heat efficiently and help it brown. The fat also adds flavor and prevents sticking. Some of the fat renders out during cooking, basting the chicken naturally.
The third secret is initial high heat followed by lower temperature. Starting at 425°F for 20 minutes jump-starts the crisping process, then reducing to 325°F allows the inside to cook through without burning the skin.
Salt draws moisture to the surface initially but then helps it evaporate during cooking. Salting 1-2 hours before cooking (or overnight) seasons deeply and promotes crispy skin through this moisture management.
How to Slow Roast Whole Chicken
Step 1: Prepare the Chicken
Remove chicken from refrigerator 30-60 minutes before cooking to take the chill off. Remove giblets from cavity if included. Pat the entire chicken completely dry with paper towels, inside and out.
Trim excess fat from around the cavity opening. These fatty pieces don’t render properly and just create smoke.
Step 2: Season Inside and Out
In a small bowl, mix softened butter with 1 teaspoon salt, ½ teaspoon pepper, and ½ teaspoon garlic powder. Using your fingers, carefully separate the skin from the breast meat by sliding your hand gently between skin and meat.
Spread half the butter mixture under the skin directly on the breast meat. This bastes the meat from inside while keeping skin crispy.
Rub the remaining butter all over the outside of the chicken. Season the entire outside generously with remaining salt, pepper, garlic powder, paprika, and thyme.
Step 3: Stuff the Cavity
Place halved lemon, halved garlic head, onion quarters, and fresh thyme sprigs into the cavity. These aromatics perfume the chicken from inside but won’t overpower the meat — serve alongside this classic creamed spinach for a complete Sunday dinner spread.
Tie the legs together with kitchen twine to create compact shape for even cooking. Tuck wing tips behind the back to prevent burning.
Step 4: Prepare the Roasting Pan
Scatter chopped vegetables in the bottom of a roasting pan. Place a roasting rack over the vegetables. The vegetables add flavor to pan drippings and prevent the bottom from burning.
Pour chicken broth or water around (not over) the vegetables. This creates moisture in the oven that prevents the chicken from drying out.
Step 5: Initial High Heat Roast
Preheat oven to 425°F. Place chicken breast-side up on the rack. Roast at 425°F for exactly 20 minutes. This initial blast of heat jump-starts the skin crisping process.
Don’t open the oven during this time—you need consistent high heat to set the skin.
Step 6: Reduce Heat and Continue Roasting
After 20 minutes, reduce oven temperature to 325°F without opening the door. Continue roasting for approximately 60-90 minutes more, depending on chicken size.
Calculate roughly 20 minutes per pound total cooking time. A 5-pound chicken needs about 100 minutes total (20 minutes at high heat, plus 80 minutes at low heat).
Step 7: Check Temperature
After 80 minutes total, start checking temperature. Insert an instant-read thermometer into the thickest part of the thigh without touching bone. When it reads 165-170°F, check the breast.
Insert the thermometer into the thickest part of the breast. When it reads 150-155°F, the chicken is done. Don’t wait for breast to reach 165°F—it will get there during resting.
If thighs aren’t at 165°F yet but breast is at 150°F, tent loosely with foil and continue cooking, checking every 10 minutes.
Step 8: Rest Before Carving
Remove chicken from oven when thighs reach 165-170°F and breast reaches 150-155°F. Transfer to a cutting board and tent loosely with foil.
Let rest for 15 minutes. During this time, the breast temperature will rise to 160-165°F from carryover cooking while juices redistribute throughout the meat.
After resting, carve and serve. The breast meat will be noticeably juicier than chicken cooked to 165°F in the oven.
Pro Tips for Perfect Roast Chicken
Air-Dry Overnight for Crispiest Skin: Place seasoned chicken uncovered in the refrigerator overnight. The air circulation dries skin perfectly for maximum crispiness.
Don’t Truss Too Tightly: Tying legs together is fine, but don’t bind them flat against the body. Leave a small gap for heat circulation to cook thighs properly.
Use a Reliable Thermometer: Cheap thermometers are often off by 10-15 degrees. Invest in a good instant-read thermometer—it’s the difference between dry and juicy chicken.
Rotate the Pan Halfway Through: If your oven has hot spots, rotate the pan 180 degrees halfway through cooking for even browning.
Save Those Drippings: The pan juices combined with roasted vegetables make incredible gravy — pour it over a side of harvard beets for a classic old-fashioned dinner plate
Let It Rest Uncovered: Tenting loosely is fine, but tight wrapping or covering steams the skin and makes it soggy. Loose tent or no covering works best.
Calculate by Weight, Not Time: Every oven is different. Use 20 minutes per pound as a guide, but always rely on temperature, not time.
Easy Variations to Try
Lemon Herb Roasted Chicken: Double the fresh herbs and add rosemary and sage — pair it with sweet southern spoon bread for a proper Southern Sunday table. Squeeze additional lemon juice over chicken before serving.
Garlic Butter Roasted Chicken: Increase garlic to 6 cloves minced in the butter. Add 2 tablespoons chopped fresh parsley to butter mixture.
Spicy Roasted Chicken: Add 1 tablespoon chili powder and 1 teaspoon cayenne to the seasoning mixture for heat.
Asian-Inspired Roasted Chicken: Replace herbs with 5-spice powder, ginger, and brush with soy-honey glaze during last 20 minutes.
Italian Roasted Chicken: Use Italian seasoning instead of thyme, add fresh basil to cavity, and serve alongside this colorful succotash for a complete summer dinner.
Maple Mustard Chicken: Brush chicken with mixture of 2 tablespoons maple syrup and 1 tablespoon Dijon mustard during last 30 minutes.
Using Leftover Roast Chicken
A 5-pound chicken yields about 3-4 cups of meat after carving. Don’t waste the carcass—it makes incredible chicken stock.
Shred leftover meat for a classic southern chicken salad sandwich, tacos, or soup. The moist meat from slow-roasted chicken tastes better in leftovers than dry meat from overcooked chicken.
Make chicken stock by simmering the carcass with vegetables, bay leaves, and peppercorns for 2-3 hours — then use it as the base for a hearty split pea soup the next day. Strain and freeze in portions for soups and sauces.
Leftover roasted chicken refrigerates for 3-4 days or freezes for up to 3 months. Reheat gently to avoid drying out—low temperature in oven with a splash of broth works best.
Frequently Asked Questions
Why is my roast chicken always dry?
You’re overcooking it to 165°F in the breast. Pull chicken when breast reaches 150-155°F; it will rise to 160-165°F during resting. This prevents overcooking while remaining safe.
How do I get crispy chicken skin?
Dry the skin thoroughly before cooking, rub with fat (butter or oil), and start at high temperature (425°F) for 20 minutes before reducing heat. Air-drying overnight creates the crispiest skin.
How long to roast a whole chicken per pound?
Calculate approximately 20 minutes per pound at 325°F after the initial high-heat period. A 5-pound chicken takes about 100 minutes total, but always use temperature, not time, as your guide.
What temperature should whole chicken be when done?
Thighs should reach 165-170°F and breast should reach 150-155°F when removed from oven. During the 15-minute rest, breast temperature rises to 160-165°F through carryover cooking.
Should I cover chicken with foil while roasting?
No. Covering traps steam and prevents skin from crisping. Roast uncovered for the entire time. Only tent loosely with foil if skin browns too quickly before chicken cooks through.
Can I roast frozen whole chicken?
Not recommended. Frozen chicken takes much longer to cook and the outside overcooks before the inside thaws. Always thaw completely in the refrigerator before roasting.
Conclusion
This classic slow roasted whole chicken recipe proves that challenging conventional wisdom—cooking to 150°F instead of 165°F in the breast—produces dramatically juicier results while remaining perfectly safe through proper resting time. Understanding that white meat and dark meat require different final temperatures explains why following a single magic number leads to either dry breast or undercooked thighs. Grandma’s slow roasting technique at moderate temperature allows the entire chicken to cook evenly without the outside drying out while waiting for the inside to finish. The initial high heat blast followed by gentle roasting creates that combination everyone wants but few achieve: crackling crispy skin surrounding impossibly juicy, tender meat that nearly falls off the bone.Whether you’re making Sunday dinner for family alongside a glazed ham with brown sugar glaze, or meal-prepping for the week, or finally trying to master the basic roast chicken that’s eluded you, this old-fashioned method delivers consistent excellence. Ready to roast chicken that’s actually juicy? Dry that skin thoroughly, use your thermometer correctly, and discover why pulling chicken at 150°F internal temperature—not 165°F—transforms this simple dish from disappointingly dry to restaurant-quality tender and moist every single time.